
I really like the Dallas DS18B20 one-wire (DOW) temperature sensors. They’re inexpensive, responsive, accurate, and interface nicely with the Crystalfontz series of 5-1/4” bay displays (I’m using the CFA635). But I have yet to see what I consider to be an acceptable solution to using these sensors immersed in a liquid-cooled system to measure coolant temperature. There have been plenty of solutions offered in the past (some posted here on this site) that have attempted to seal the sensors into the cooling circuit with silicone RTV compounds, particularly the so-called “aquarium grade” ones, but many of these eventually leak (just like most aquariums eventually leak) and almost all that I’ve seen are simply “sloppy” looking (largely caused by the poor manageability due to the high viscosity of the RTV). There have also been lots of attempts to place these sensors inside of sealed stainless steel or copper tubes (so-called thermowells), but I expect this approach significantly reduces the responsiveness of the naked sensor, and real thermowells are very expensive. The intention of this post is to outline a recipe for making the definitive liquid-immersed DOW temperature sensor that lives up to high performance, reliability and appearance standards.
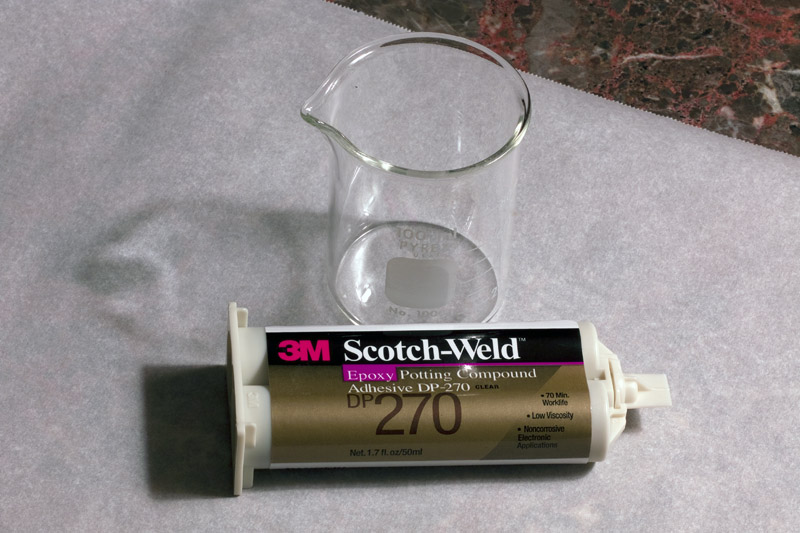
The Dallas sensors available from Crystalfontz come prepared with color-coded wire leads and a cast rubber “boot” that is molded at the base of the TO-92 sensor case to encapsulate the connection points (http://www.crystalfontz.com/product/WRDOWY17.html). These are relatively inexpensive, and are tidy, nicely-made, assemblies. For months, I've been doing a lot of research and testing of sealant compounds for this application. One approach that kept my interest for a while was to dip the DOW assemblies into Oatey Rain-or-Shine PVC cement, which completely encased the sensor in a very thin PVC film. Unfortunately that film wouldn’t adhere very well to metallic plumbing fittings, which are my preference in water cooling, so I wasn’t too confident with that. I also tried the time-tested and water-proof PC-7 epoxy that adheres extremely well to metal, but is too thick to work with in tight places, and really doesn’t adhere to the plastic sensor case very well. To make a long story short, in the end I selected electronics-grade 3M DP-270 clear conformal epoxy – a favorite of RC boat enthusiasts for potting circuit boards in submerged applications. This is available from McMaster-Carr (catalog page 3317), among other places.
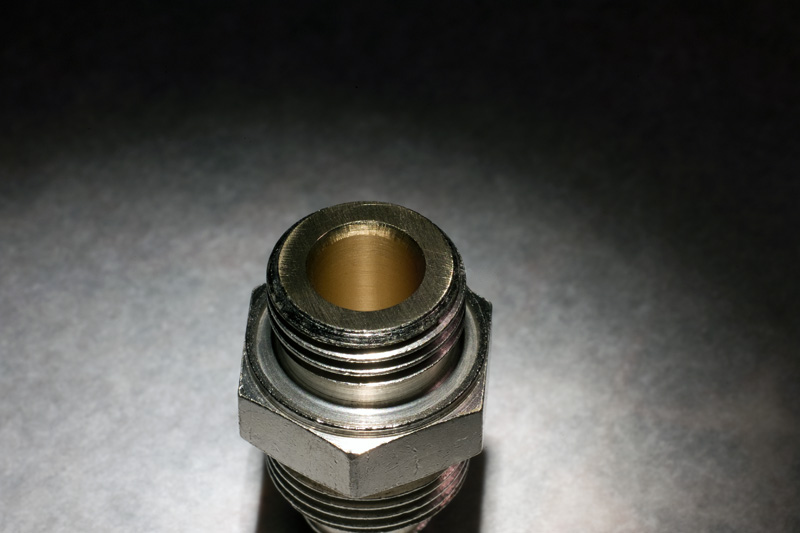
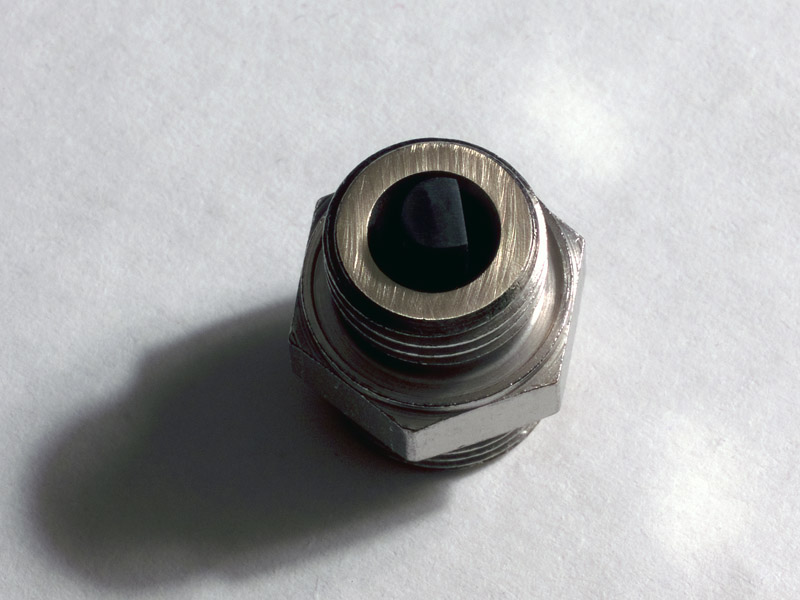
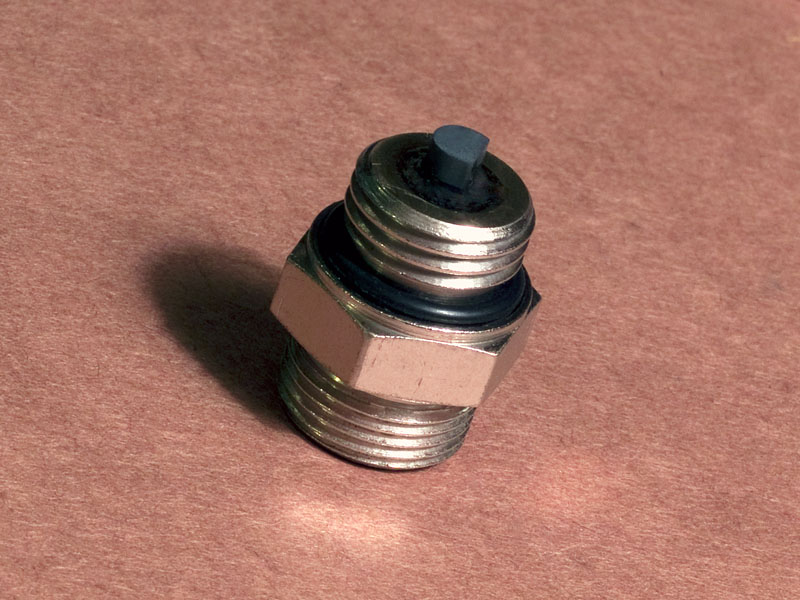
The approach uses small G1/4 BSPP threaded/o-ringed nickel-plated brass compression fittings - the kind the watercooling community is familiar with. I am using the Innovatek variety, designed for 6mm ID / 8mm OD tubing (http://www.frozencpu.com/products/2...ew-In_Type_Fitting_500179.html?tl=g30c101s176), because they are conveniently sized for this application, and I had some laying around. Others should work too. The basic fitting is shown here:
To ensure high shear adhesion of the DP-270, the nickel plating of the interior surfaces of the otherwise solid brass fittings that will be placed in contact with the epoxy is first removed and the brass is given some "tooth". This is easily done with a bronze or beryllium-copper brush that is typically used for cleaning gun barrels:
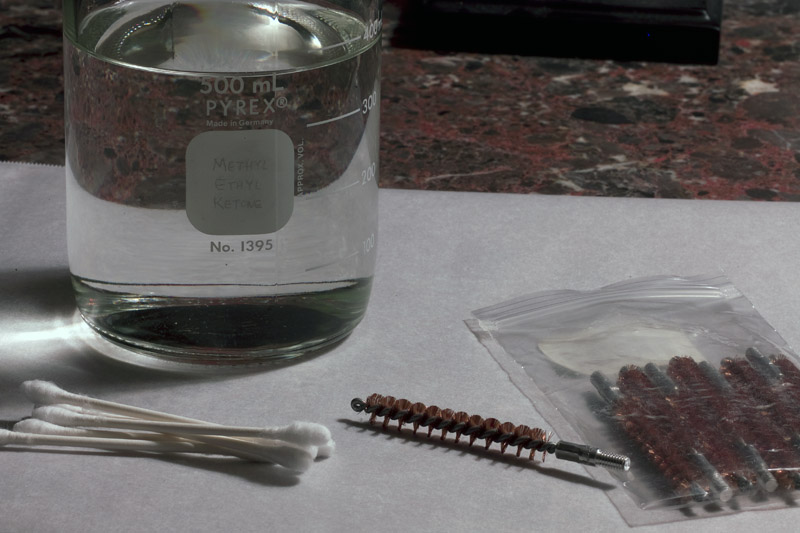
and repeatedly stroked through the bores while spinning with an electric drill. The base of the fitting is also slightly chamfered, and sanded with 400-grit aluminum oxide paper. Then the entire fitting is repeatedly wiped with methyl ethyl ketone (MEK), using cotton swabs. The result is seen here:
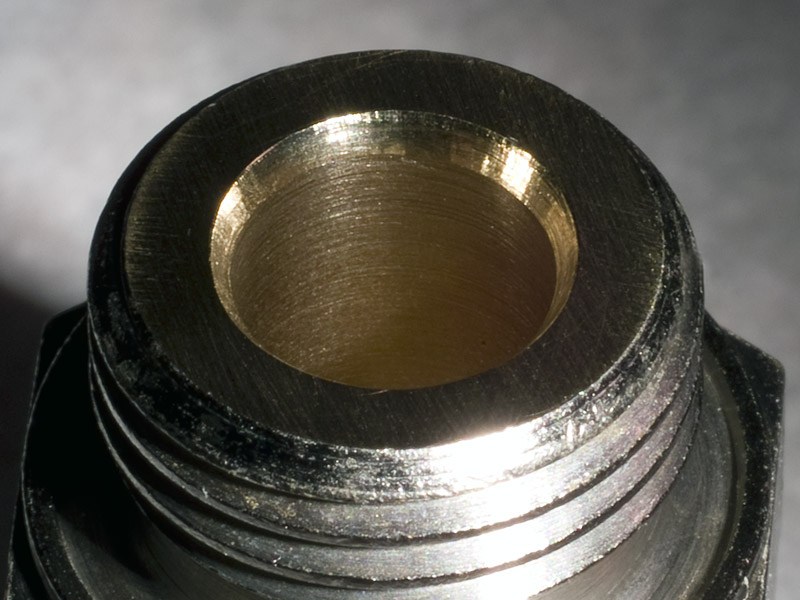
and here:
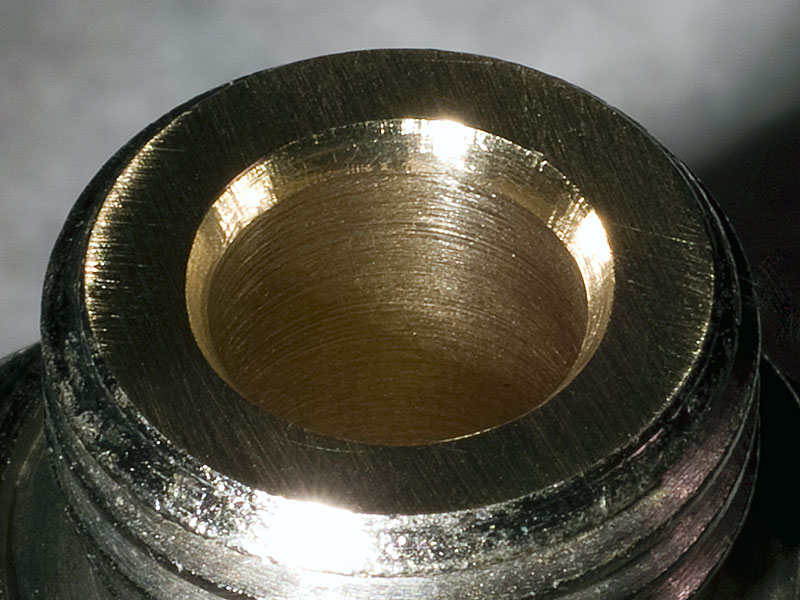
[Note: I also experimented with etching the brass with a 50/50 mixture of household ammonia (clear / non-sudsing) and household hydrogen peroxide (3%). While this is effective, it is no more effective than using the bronze brush and sandpaper, so I abandoned this more complicated process.]
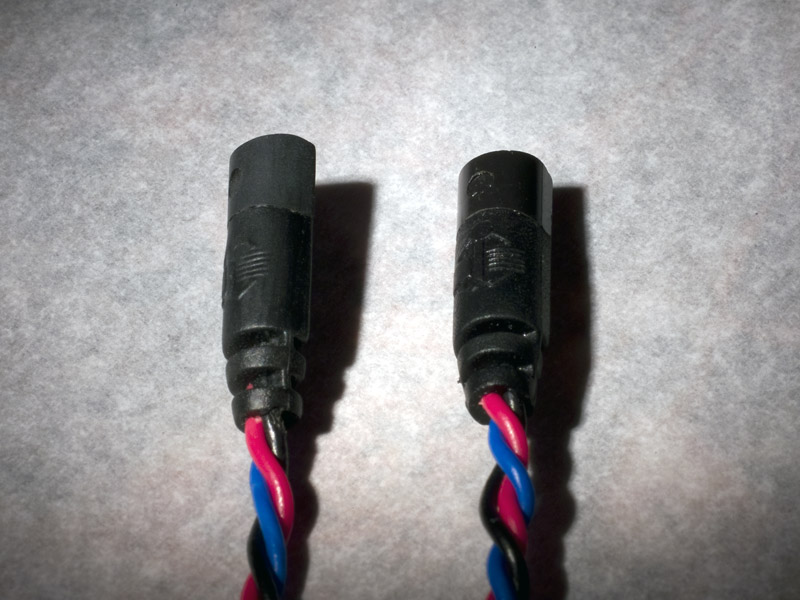
The Dallas sensor assemblies supplied by Crystalfontz are prepared next. The plastic TO-92 sensor case is prepared for bonding by lightly - but thoroughly - sanding all around with 400-grit aluminum oxide paper, then wiping with MEK using a cotton swab. The rubber boot is also thoroughly wiped with MEK as well. Below, the sensor on the right is in original condition, while the one on the left has been sanded:
Without touching the areas just cleaned with MEK, the sensor assembly leads are passed through two small rubber grommets:
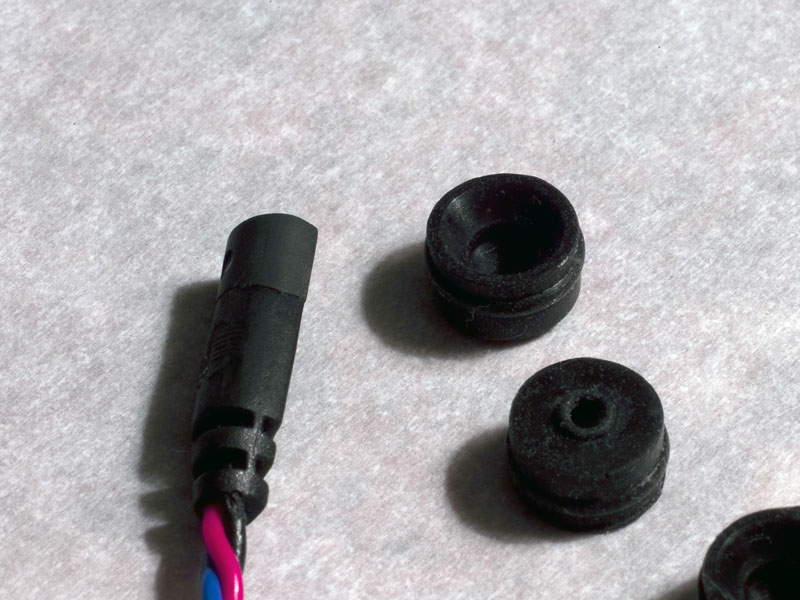
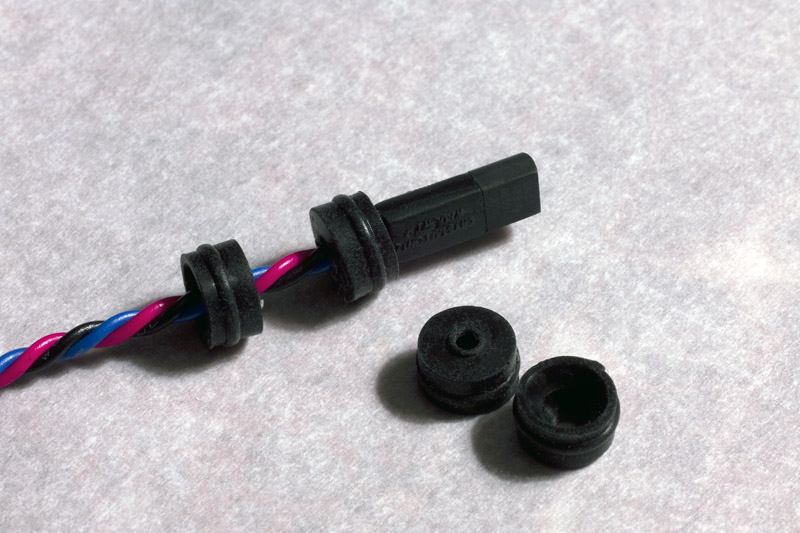
that will temporarily be used to support the sensor assembly in the bore of the compression fitting – properly positioning the TO-92 sensor case at the G1/4 threaded end of the fitting such that the sensor case protrudes slightly less than half-way (0.1”) beyond the end of the fitting:

The fitting is then suitably supported so that its bore is oriented vertically, with the G1/4 threaded end (and TO-92 sensor case) up. I use a small cardboard box with holes in it:
The 2-component DP-270 is thoroughly mixed up in a beaker:
and then poured into a disposable syringe that is equipped with a disposable Luer-Lok blunt cannula needle:

The latter can be found at McMaster-Carr (catalog page 3342) among other places. The needle is then gently inserted down into the compression fitting bore alongside the thermal sensor assembly:

until the top-most rubber grommet is felt. Then, the epoxy is injected from the syringe until it rises to the level of, or ever-so-slightly above, the top-most surface of the compression fitting – being sure that the lower-half of the TO-92 sensor case is completely wet by the epoxy, and that the chamfered region of the fitting mouth is completely filled, in the process:
After the epoxy is allowed to set (approximately 3 hours), the two rubber grommets are carefully removed, using suitable tweezers, from the tube barb end of the compression fitting. Now the fitting is suitably supported so that its bore is again oriented vertically, but with the G1/4 threaded end (and TO-92 sensor case) down this time. Another batch of DP-270 epoxy is mixed up, another needle-equipped syringe loaded with it, and the balance of the compression fitting bore is completely backfilled to encapsulate the sensor wires leaving the fitting:

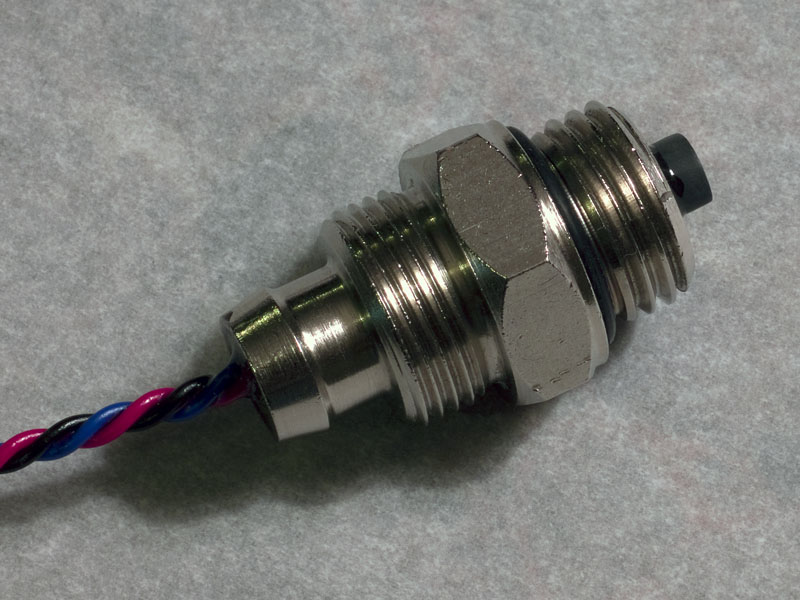
After this second application of epoxy is allowed to fully cure (approximately 48 hours), the completed sensor assembly:
is ready for sleeving, installation and service. Economy of scale dictates that several sensors be prepared at one time:
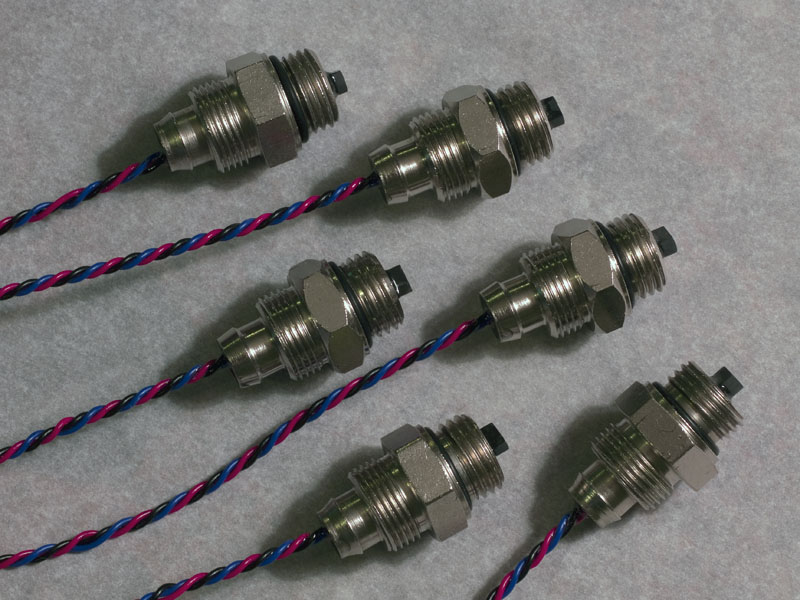
so as to limit the number of epoxy batches that need to be made up and the number of syringes consumed.
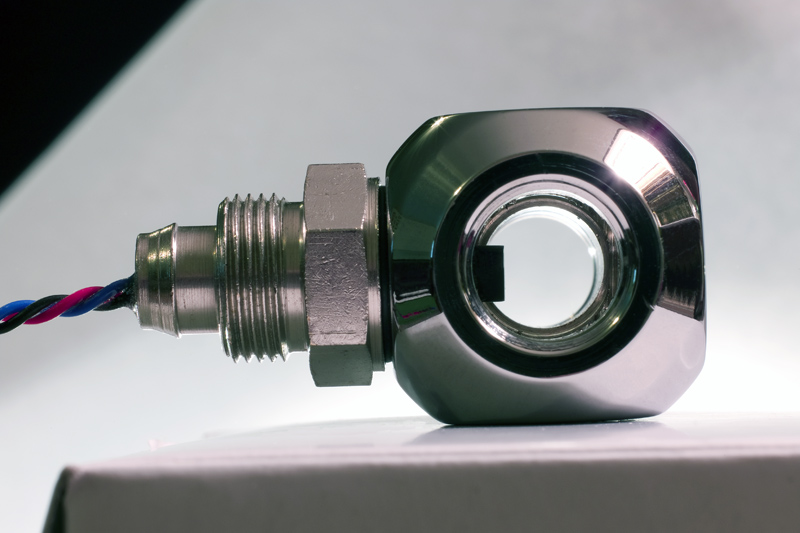
I'm putting mine in Bitspower Rotary-Q fittings:
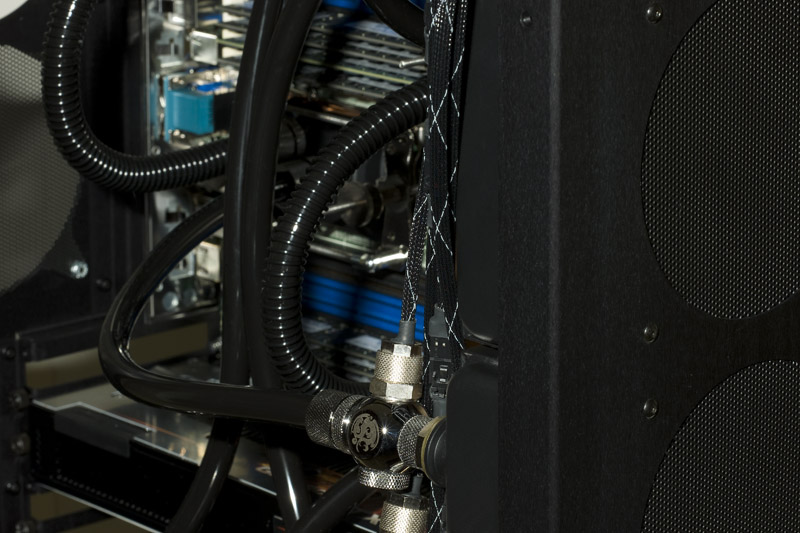
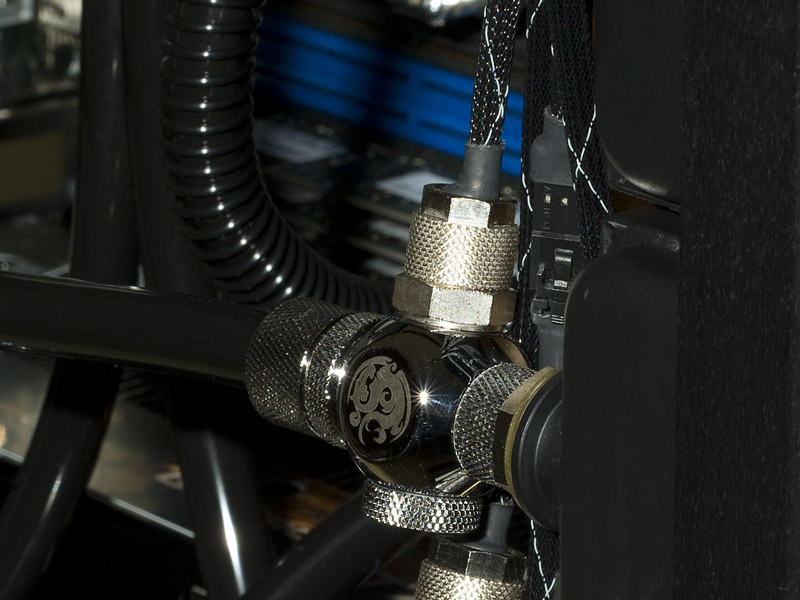
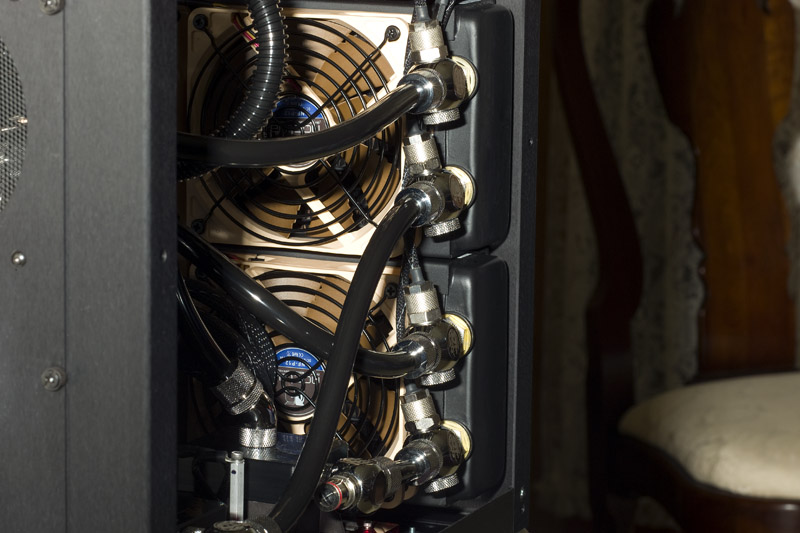
and these will be used to monitor the inlet and outlet water temperatures at radiators in my rig:
For the two CPU cooling loops shown above, CC2 is easily set up to demo the results on the CFA635:

and control some fans based on the measured temperatures:

A final note on using the Dallas sensors:
There's a little known, but noteworthy, accuracy improvement technique for the DS18B20 temperature sensors that I want to point out to anyone interested in using these. The DS18B20's are factory calibrated to have accuracy better than or equal to ±0.5°C, which is sufficient for most of our watercooling applications. However, if you want to push performance another order of magnitude, there is a simple procedure that compensates for the offset and curvature of the device error characteristic. Details are in a white paper found at http://www.maxim-ic.com/appnotes.cfm/an_pk/208. Note that the technique presented in the paper can be applied to any IC temperature sensor having a bandgap-based thermal circuit (such as the DS18B20), but generally not other sensors based on different technology.
enjoy,
Jim
The Dallas sensors available from Crystalfontz come prepared with color-coded wire leads and a cast rubber “boot” that is molded at the base of the TO-92 sensor case to encapsulate the connection points (http://www.crystalfontz.com/product/WRDOWY17.html). These are relatively inexpensive, and are tidy, nicely-made, assemblies. For months, I've been doing a lot of research and testing of sealant compounds for this application. One approach that kept my interest for a while was to dip the DOW assemblies into Oatey Rain-or-Shine PVC cement, which completely encased the sensor in a very thin PVC film. Unfortunately that film wouldn’t adhere very well to metallic plumbing fittings, which are my preference in water cooling, so I wasn’t too confident with that. I also tried the time-tested and water-proof PC-7 epoxy that adheres extremely well to metal, but is too thick to work with in tight places, and really doesn’t adhere to the plastic sensor case very well. To make a long story short, in the end I selected electronics-grade 3M DP-270 clear conformal epoxy – a favorite of RC boat enthusiasts for potting circuit boards in submerged applications. This is available from McMaster-Carr (catalog page 3317), among other places.
The approach uses small G1/4 BSPP threaded/o-ringed nickel-plated brass compression fittings - the kind the watercooling community is familiar with. I am using the Innovatek variety, designed for 6mm ID / 8mm OD tubing (http://www.frozencpu.com/products/2...ew-In_Type_Fitting_500179.html?tl=g30c101s176), because they are conveniently sized for this application, and I had some laying around. Others should work too. The basic fitting is shown here:
To ensure high shear adhesion of the DP-270, the nickel plating of the interior surfaces of the otherwise solid brass fittings that will be placed in contact with the epoxy is first removed and the brass is given some "tooth". This is easily done with a bronze or beryllium-copper brush that is typically used for cleaning gun barrels:
and repeatedly stroked through the bores while spinning with an electric drill. The base of the fitting is also slightly chamfered, and sanded with 400-grit aluminum oxide paper. Then the entire fitting is repeatedly wiped with methyl ethyl ketone (MEK), using cotton swabs. The result is seen here:
and here:
[Note: I also experimented with etching the brass with a 50/50 mixture of household ammonia (clear / non-sudsing) and household hydrogen peroxide (3%). While this is effective, it is no more effective than using the bronze brush and sandpaper, so I abandoned this more complicated process.]
The Dallas sensor assemblies supplied by Crystalfontz are prepared next. The plastic TO-92 sensor case is prepared for bonding by lightly - but thoroughly - sanding all around with 400-grit aluminum oxide paper, then wiping with MEK using a cotton swab. The rubber boot is also thoroughly wiped with MEK as well. Below, the sensor on the right is in original condition, while the one on the left has been sanded:
Without touching the areas just cleaned with MEK, the sensor assembly leads are passed through two small rubber grommets:
that will temporarily be used to support the sensor assembly in the bore of the compression fitting – properly positioning the TO-92 sensor case at the G1/4 threaded end of the fitting such that the sensor case protrudes slightly less than half-way (0.1”) beyond the end of the fitting:
The fitting is then suitably supported so that its bore is oriented vertically, with the G1/4 threaded end (and TO-92 sensor case) up. I use a small cardboard box with holes in it:
The 2-component DP-270 is thoroughly mixed up in a beaker:
and then poured into a disposable syringe that is equipped with a disposable Luer-Lok blunt cannula needle:
The latter can be found at McMaster-Carr (catalog page 3342) among other places. The needle is then gently inserted down into the compression fitting bore alongside the thermal sensor assembly:
until the top-most rubber grommet is felt. Then, the epoxy is injected from the syringe until it rises to the level of, or ever-so-slightly above, the top-most surface of the compression fitting – being sure that the lower-half of the TO-92 sensor case is completely wet by the epoxy, and that the chamfered region of the fitting mouth is completely filled, in the process:
After the epoxy is allowed to set (approximately 3 hours), the two rubber grommets are carefully removed, using suitable tweezers, from the tube barb end of the compression fitting. Now the fitting is suitably supported so that its bore is again oriented vertically, but with the G1/4 threaded end (and TO-92 sensor case) down this time. Another batch of DP-270 epoxy is mixed up, another needle-equipped syringe loaded with it, and the balance of the compression fitting bore is completely backfilled to encapsulate the sensor wires leaving the fitting:
After this second application of epoxy is allowed to fully cure (approximately 48 hours), the completed sensor assembly:
is ready for sleeving, installation and service. Economy of scale dictates that several sensors be prepared at one time:
so as to limit the number of epoxy batches that need to be made up and the number of syringes consumed.
I'm putting mine in Bitspower Rotary-Q fittings:
and these will be used to monitor the inlet and outlet water temperatures at radiators in my rig:
For the two CPU cooling loops shown above, CC2 is easily set up to demo the results on the CFA635:
and control some fans based on the measured temperatures:
A final note on using the Dallas sensors:
There's a little known, but noteworthy, accuracy improvement technique for the DS18B20 temperature sensors that I want to point out to anyone interested in using these. The DS18B20's are factory calibrated to have accuracy better than or equal to ±0.5°C, which is sufficient for most of our watercooling applications. However, if you want to push performance another order of magnitude, there is a simple procedure that compensates for the offset and curvature of the device error characteristic. Details are in a white paper found at http://www.maxim-ic.com/appnotes.cfm/an_pk/208. Note that the technique presented in the paper can be applied to any IC temperature sensor having a bandgap-based thermal circuit (such as the DS18B20), but generally not other sensors based on different technology.
enjoy,
Jim
Looking for additional LCD resources? Check out our LCD blog for the latest developments in LCD technology.
Last edited:
