CF Tech
Administrator
A customer of ours was working on thermal characteristics of a server design, and wanted to measure 30 temperatures at various locations within the server's case. Our WRDOWY17 temperature sensor is a natural choice for this type of application. The WR-DOW-Y17 is compact, accurate and the "one-wire" daisy-chain design keeps the wiring mess to a minimum:

A CFA533 gives an easy serial or USB interface to 32 WRDOWY17 sensors, but the customer's monitoring PC was some 200 feet from the server under test. By combining some common off-the-shelf parts, we hacked together a pair of power + RS232 converters that allow the power and communications signals to all be run on common CAT-6 cable.
Since RS-232 ports are becoming quite rare on PCs, we started with a standard USB to RS-232 converter from FTDI, the FTDI EVAL232R:

It just so happened that we had several of these in-house from a previous project, and already had them installed in some natty 3d-printed cases:


The serial side of the EVAL232R is "full swing" RS232, which gives great noise immunity and can therefore span long distances. Using the CFA533TFHKS (KS = full swing serial) on the other end keeps both the Rx and Tx signals "true RS232", which can span a great distance.
We also need to get power from the to the module, and even though we will use two conductors of the CAT-6 cable, over a long enough distance, the voltage drop could still add up. The wide voltage range (+3.3v to +5.5v) of the CFA-533 helps us out here, we could drop up to 2.2v on the cable and still have full functionality.
To go from the EVAL232R to the CAT-6, we used the WR232Y18 power + RS232 cable. This cable plugs directly into the EVAL232R, and gives a clean method to introduce power from a standard 5v DC wall bug. Note that if you had a PC that has a serial port, you could dispense with the EVAL232R and plug the WR232Y18 directly into the PC's serial port.
We want to use CAT-6 for the long run of the cable, mainly because it is low cost and readily available. Note that this is only CAT-6 wiring, it is not ethernet. We need to make an adapter to go from the pre-cut and tinned end of the WR232Y18 into the CAT-6. First we made up a couple of CAT-6 pigtails:

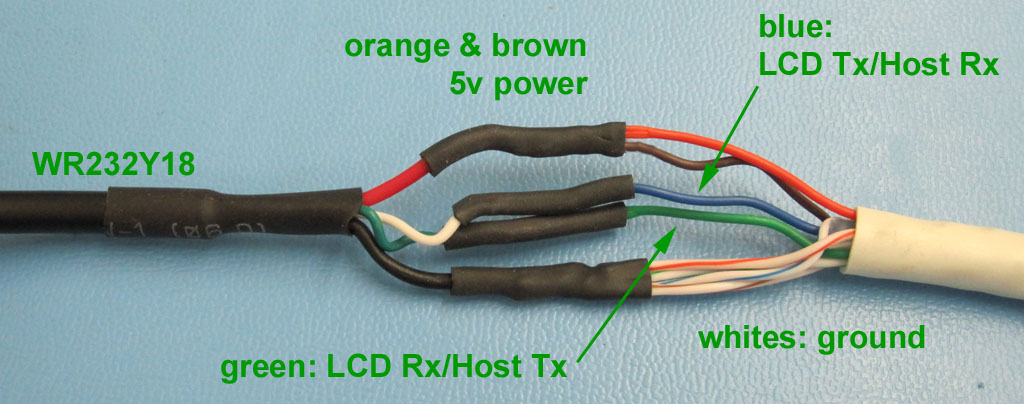
Then soldered the pigtail to the WR232Y18:
 \
\
I chose to use the CAT-6 wiring as follows:
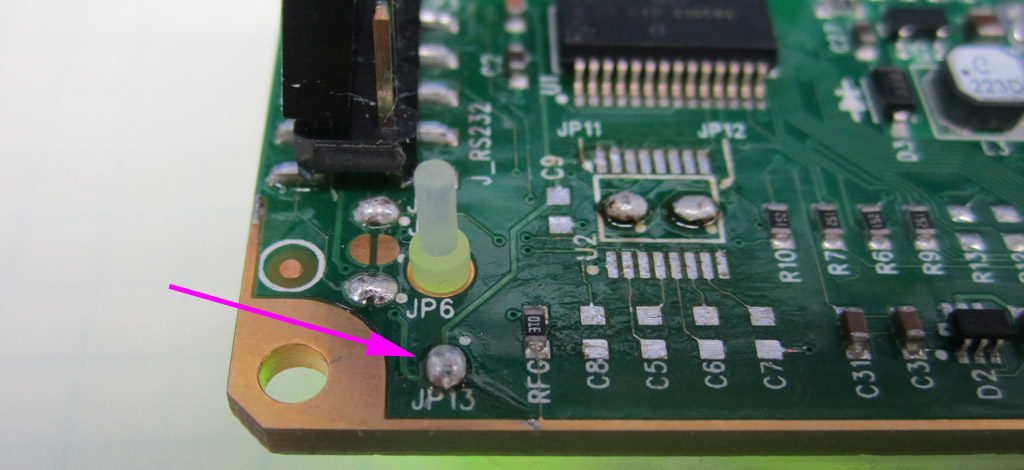
Referring once again to the datasheet to data sheet, we can see wich pins on the CFA533's 10-pin header correspond to Rx, Tx and ground:

Now we have enough information to make the LCD end CAT-6 to WR232Y08 ribbon cable connection:

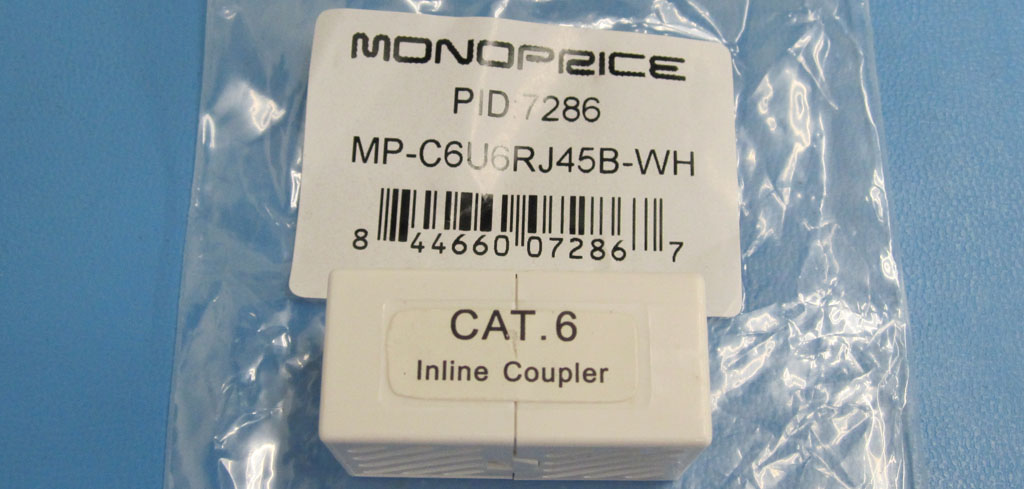
Now we can plug the two adapters together using some CAT-6 couplers:
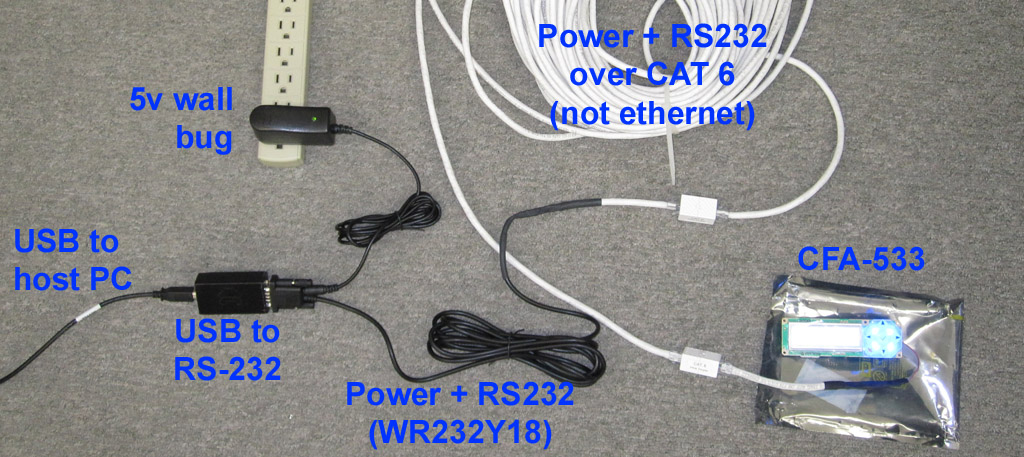
Then it is time to hook it all up with a monster CAT-6 patch cable, and give it a try:
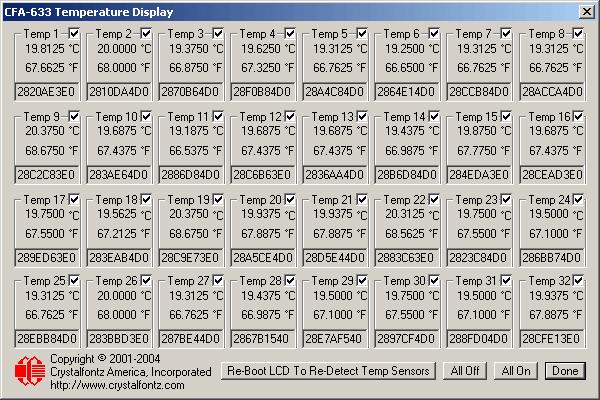
So at this point, the customer only need place the CFA533 near the server under test, daisy-chain up to 32 WRDOWY17 sensors to it, the load up 633 WinTest on the host PC to log the temperatures to a CSV file, or view them in real time:

A CFA533 gives an easy serial or USB interface to 32 WRDOWY17 sensors, but the customer's monitoring PC was some 200 feet from the server under test. By combining some common off-the-shelf parts, we hacked together a pair of power + RS232 converters that allow the power and communications signals to all be run on common CAT-6 cable.
Since RS-232 ports are becoming quite rare on PCs, we started with a standard USB to RS-232 converter from FTDI, the FTDI EVAL232R:

It just so happened that we had several of these in-house from a previous project, and already had them installed in some natty 3d-printed cases:


The serial side of the EVAL232R is "full swing" RS232, which gives great noise immunity and can therefore span long distances. Using the CFA533TFHKS (KS = full swing serial) on the other end keeps both the Rx and Tx signals "true RS232", which can span a great distance.
We also need to get power from the to the module, and even though we will use two conductors of the CAT-6 cable, over a long enough distance, the voltage drop could still add up. The wide voltage range (+3.3v to +5.5v) of the CFA-533 helps us out here, we could drop up to 2.2v on the cable and still have full functionality.
To go from the EVAL232R to the CAT-6, we used the WR232Y18 power + RS232 cable. This cable plugs directly into the EVAL232R, and gives a clean method to introduce power from a standard 5v DC wall bug. Note that if you had a PC that has a serial port, you could dispense with the EVAL232R and plug the WR232Y18 directly into the PC's serial port.
We want to use CAT-6 for the long run of the cable, mainly because it is low cost and readily available. Note that this is only CAT-6 wiring, it is not ethernet. We need to make an adapter to go from the pre-cut and tinned end of the WR232Y18 into the CAT-6. First we made up a couple of CAT-6 pigtails:

Then soldered the pigtail to the WR232Y18:

I chose to use the CAT-6 wiring as follows:
- solid green: RS-232 LCD Rx/Host Tx (signal return -- ground -- is on the other side of the twisted pair, green/white)
- solid blue: RS-232 LCD Tx/Host Rx (signal return -- ground -- is on the other side of the twisted pair, blue/white)
- solid orange and solid brown: +5v from, host to LCD (power returns -- ground -- other sides of the twisted pairs, orange/white and brown/white)

Referring once again to the datasheet to data sheet, we can see wich pins on the CFA533's 10-pin header correspond to Rx, Tx and ground:

Now we have enough information to make the LCD end CAT-6 to WR232Y08 ribbon cable connection:

Now we can plug the two adapters together using some CAT-6 couplers:

Then it is time to hook it all up with a monster CAT-6 patch cable, and give it a try:

So at this point, the customer only need place the CFA533 near the server under test, daisy-chain up to 32 WRDOWY17 sensors to it, the load up 633 WinTest on the host PC to log the temperatures to a CSV file, or view them in real time:

Looking for additional LCD resources? Check out our LCD blog for the latest developments in LCD technology.

